July 05, 2013

A Salty Treat for the Salty Shore

Prepping for the 4th of July literally meant Mr. and I were in the kitchen all day - ALL day.  Today was the first truly sunny day in what I think we had in weeks, if not months, maybe even years. I feel like rain has been pouring down since as long as I can remember -and the one day the sun decided to peek out, we had to man the kitchen.  However, after looking at the five day forecast, it seems promising that we didn't miss out on the only sunny day. 

After visiting the local ice cream shop multiple times this week (and it's only Wednesday), I can't seem to get enough of the Salted Carmel Pretzel ice cream.  I decided to carry this sweet treat over in the form of a cookie.  Scouring the internet, I adapted the recipes I found from Ambitious Kitchen,  and created a salty goodness ready for the 4th of July. 

The one main ingredient that makes this recipe mind-blowing (maybe that's a bit exaggerated, maybe not) is Nutella. Now, if you have never in your life had the chocolate hazelnut spread that is Nutella, please run out to the store now,buy it and spread it on anything. Seriously - anything. A piece of bread, moldy cheese, anything. It will literally change your life in only the best way possible. 

Now with that being said,  if you aren't a fan of hazelnut chocolately goodness, then just omit it from the recipe. But don't hate it till you tried it :)

Nutella Stuffed Chocolate Chip Cookies and Sea Salt

2 1/4 cups flour
1 1/2 sticks of butter (melted)
2/3 jar of Nutella
1 cup chocolate chips (let's be real - I use the whole bag)
1 teaspoon baking soda
1 cup brown sugar
1/4 sugar
2 eggs
2 teaspoons vanilla extract
1 tablespoon greek yogurt


  1. Mix flour and baking soda together and set aside. 
  2. With a mixer, mix the butter and sugars until well blended. Beat in the eggs, vanilla, and yogurt until combined. Add the flour mix and beat until completely combined. Gently fold in all of the chocolate chips.
  3. Place dough in fridge for at least 2 hours. I left mine in for 4 hours, which worked out better with the Nutella. Place Nutella in fridge during this time to solidify a bit. 
  4. Preheat the oven to 350 degrees. After dough hardens, take out of fridge and make into balls of dough.  Flatten them in the palm of your hand and spoon chilled Nutella in the middle. Be sure to fold dough around this gently and completely. 
  5. Bake the cookies 10 minutes or until the edges of the cookies begin to turn golden brown. They will look a bit underdone in the middle, but will continue to cook once out of the oven. Cool the cookies on the sheets and sprinkle with a little sea salt. 


I am NOT a fan of salt, but these cookies had a different type of taste that set them apart from most chocolate chip cookies I've made.  I think sea salt had a lot to do with that.  So yummy with a tall glass of milk!
Enjoy!


Signature

July 04, 2013

An Apple a Day


To counteract all the sugar I recently devoured, a healthy lunch was in order. To go along with my deep seeded love for green apples, Mr. and I thew together this yummy salad. By Mr and I, I mean I told him what to do and he made it. Details.

Kale Apple Chicken Salad

Dressing
1/4 cup apple cider vinegar
1/3 cup olive oil
1 1/2 tablespoon of dijon mustard
1 1/2 teaspoon honey
sea salt to taste

1 bunch kale
2 green apples - cored and cubed
1/2 cup dried cranberries
3 ounces crumbled goat cheese (we just used the entire container)
1 pound chicken - grilled and cubed

*As the chicken was grilling, we made the dressing. However, if you don't have the ingredients, you can always mix it with any dressing - I've used Newman's Lite Honey Mustard and Raspberry. Both so yummy!

This salad made enough for 4 helpings and still enough for another sitting.


*Thank you Domino Sugar for making an appearance in this picture. Your assistance in baking my desserts was most appreciated.  Too bad I am a jerk and used you for everything you had.

Try this recipe - you will not be disappointed!


Signature

Gimme S'more of that Mess

First off, I have a love-hate relationship with s'mores. I love the idea of them, but it somehow ends up not only on my fingers, but in my hair, up my nose, and once in my ear. I don't know. Clearly I can't control my hands, and I guess I touch my face more often than I realize...But a summer without the graham cracker, mallow and chocolate mix doesn't quite seem like a summer. 

To prevent the blinding marshmallow mess that usually ensues during the 4th day in July, I thought maybe I would make S'more bars to prevent any embarrassing facial messes. I adapted the recipe from Sally's Kitchen, and came up with a sticky mess. Somehow what I made, looked NOTHING like what she created.
 I felt like I am on Pinterest Fail (a wildly amusing site that I wished I thought of!) Basically, it's where  "good intentions come to die." With that motto, I wish I could squeeze the girl that writes this blog and call her my new best friend. I literally pee with laughter when I see the contributing pictures  ....well maybe not literally pee, but I'm peeing on the inside. Just thinking about the hanging string ball or the "Bake a heart into a cupcake" makes me giggle all over again. 
But I digress.....
This recipe did NOT in any way turn out the way I thought it would look....I guess that's mainly because I had measuring and don't fallow directions that well.  However, they taste AMAZING!! The additional peanut butter chip was a great  add-on. 

S'More Cookie Bar

1 stick of melted butter
3/4 cup brown sugar
1 1/2 teaspoon vanilla
1 large egg
1 cup flour
1 cup graham cracker crumbs
1/2 teaspoon baking powder
1 and 1/4 cup chocolate chips
a whole bag of mini marshmallows (maybe this was my downfall?)
half bag of peanut chips
8oz of sweetened condensed milk


  1. Preheat oven to 350F degrees. Line 8x8 tray with parchment paper and spray.  **This is important - I used a tray WAY to big, and ran out of mix......** This recipe makes enough for a family of four, or one person who has a serious addiction problem with sweet treats. 

  1. Cream the butter and brown sugar together on medium speed. Beat for about 2 minutes until smooth and combined. Add the vanilla extract and egg, beating until combined. Scrape the sides of the bowl down as needed. Set aside.

  1. Toss the flour, graham cracker crumbs, and baking powder together until combined. With the mixer running on low, slowly add the dry ingredients to the wet ingredients. Mix until combined.

I used a 9x13 pan because that's all I had at the shore - DON'T do that unless you make more mix


  1. Press 2/3 of the graham cookie dough into prepared pan. Cover the layer with the mini marshmallows. The sprinkle with chocolate chips. 


 I covered half with just chocolate chips and the other half of the tray with peanut butter chips and chocolate chips.

Drizzle the entire can of sweetened condensed milk on top. 

  1. Bake the bars for 22 minutes, or until the top is lightly golden brown. Allow to cool completely before cuttng into squares.

*These taste amazing, but don't have the look appeal. But really, does it matter if it looks good? It doesn't look that fabulous once my teeth mash it up!*

Instead of neat little squares, they came out more like oblong misshapen messes - BUT they were fantastic.
Signature

July 02, 2013

Cayenne Margaritas and thoughts


One of my favorite places to spend my summer days is my parents' shore house.  There's something about salty air, the call of seagulls, and being able to catch your dinner right in the backyard that puts life into perspective.   Every weekend, we leave our troubles in North Jersey, as we drive down the Parkway to Exit 58. Seven of us, my favorite seven people in the world spend each (or most) Friday nights through Sunday nights together.  Between board games, fishing, eating (lots of eating), and drinking, memories are made.

This past weekend, A created a wickedly delicious margarita recipe.   


She always has the best concoctions - so we left it up to her to make the mixings. 


I've been on a super fruit kick, and before we left for the shore, A asked if I like grapefruit. I can say in all honesty, I find them irritating to eat because I can never open them like people say. Instead, I end up squirting myself in the eye.  With that being said, A decided to create a fun mix to ring in Saturday night :)

Cayenne Grapefruit Margaritas
Tequila 12 oz
grapefruit juice 22 oz
tonic water 14 oz
cayenne pepper 1/4 tsp
This should make 6 drinks!
(The original recipe she found called for simple syrup, but I'm not a fan - so she switched to Tonic water which is also no cal)


You can even see the pepper floating on the top. 


It had just enough pop to open your sinuses but not too much that you sneezed (maybe that's just me) or cause you to gag. 

You can either use grapefruit juice OR squeeze fresh grapefruit - which we tried but it was SUPER duper messy. 


Try and let me know what you think!


Signature

Last Summer's Conquest


I find myself obsessed with Pinterest - so much in fact, I have only allowed myself the hour before bed to look through the countless pages of recipes, crafts, home decor because I could literally waste away my entire day.
I saw a  fantastic piece of furniture - a cable spool table that I HAD TO HAVE.  It was my personal quest last summer. After researching how to obtain one without stealing it from a cable company, I posted my plea on Facebook, and a friend had in their garage, just taking up space :) They, too, had plans to make furniture out of it but life got in the way. She was happy to see it going to someone who would make it into a piece of love. Success! Who said social media was a waste of time? Not me! I picked it up, free of charge, and hauled it home.
It was a bit taller than I expected, but I didn't care - soon I would have my own spool table to organize some of my books.


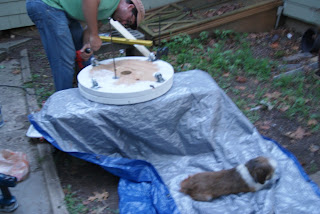
We sanded the table top down, and I painted it white.  

After painting, Mr. screwed on caster wheels on the bottom.  Though I don't have any intentions of pushing it around, it added a little industrial flair (or made it easier if I wanted to push it around:) 

We had our security dog sit watch, or sit and sleep. Wherever we told P NOT to sit, that's exactly where she planted herself. Crafty lil dog. 

I hemmed and hawed over whether the table was too high. Before putting the spindles on, we put it in the spot in the dining room. It was actually above the chair - not really good for a side table, as it came up to your chest in the chair.   But Mr. said it wouldn't be a big deal to disassemble it, and cut the middle planks. Well, I think if he realizes it would take three people to hold the sides together , I don't think he would have volunteered. He took apart the boards and cut off about six inches.    The biggest challenge was putting it back together! After a few grunts and curses, we were able to place the top back on.    
  We wheeled it in the dining room and Voolah! I couldn't fill it with books faster!
It looked better than I could imagine!

I placed my aloe plant (yes, it's still alive!), one of my favorite games- Mancala, and a picture of Little. An afternoon of sawing and painting, and I couldn't be happier! 

Total cost: $16
We got the spool for free and used old white paint from trim.
At Home Depot, we bought 4 caster wheels for $12 and two 6 foot long dowels for $4.


Signature

June 30, 2013

Before I Fall Book Review


There are books that seem to take forever to read, and then there are those that you can't put down. That you lose sleep over.  Before I Fall by Lauren Oliver was one of those books.  I started reading it this morning, and finished before dinner. I LOVED the concept. 
I will start this off by saying I don't like to write reviews of the books I love. I never seem to capture the magic of the novel, and can't get across the beauty of words all the time. 
I will try. 
This book is a cross between Mean Girls and Groundhog's Day (sorry for two film references but I adore both movies!). A girl and her pack of three friends rule the school and are relentlessly nasty to almost everyone.  On their way home from a party, they crash the car and die.  This isn't giving much of the book away because you learn this just by reading the back cover, and yet the main character, Sam, wakes up the next morning - again, on Cupid's Day.  She wakes up six more times to relive the week and hopefully make sense of her life and make a difference.  
Without giving much away, she definitely attempts to seek redemption and the end of the book had me sobbing, just like Fault in Our Stars (a book I read last summer and my family had to give me a pep talk about reading misery books while on vacation). I found myself rooting for her, hoping she would make certain choices, praying she would somehow make it out alive at the end of the week. 
I loved it. I am sad it's over. I wished things could turn out differently in the end, but the book provides hope and if anything - sends across the message that anyone can be fixed. Anyone can make a difference. 

Signature

Thank you


I am not someone who fears their birthday - in fact, I welcome it.  I love the idea of getting together with family, I adore balloons, and deeply enjoy cake. ANY cake. 
Yet every year, I have this irrational fear that my husband will forget. Forget my day. Days leading up to it, I literally am an annoying fly buzzing around, reminding him. Every year, he reassures me that he's not Last minute Larry with this. I don't really care about the gifts, but I just want effort, and forethought.  

This year, we celebrated with my family the weekend before and mother made my favorite pie - Strawberry Dream. YUM. I can not say enough good things.  I literally do the title - dream of this pie. Therefore, even though we were going out to a restaurant for my actual day, no homemade cake would be had - which I was completely fine with.  However, when I arrived home after work on my day, there in the fridge laid not one, but two cakes for my birthday. Made by Mr.  Let me state this: He is not a baker. He does not have sweet tooth, so the fact that he went through the trouble and then actually cleaned up the kitchen afterwards and before I got home was enough for me.  


(I had to post these because these Toms are my FAVORITE pair I own - given to me by A.) If you don't own a pair, these are the ones to get! They are crochet and lime green.  They fit like a glove, and the best part about Toms - every pair you buy, a pair gets donated. You buy they give!


Thank you B for always making me feel special. Thank you for remembering my day.  Thank you for whipping up your version of Strawberry Dream pie, and then a WONDERFULLY delicious coconut cake.  I loved it almost as much as I love you. 


Signature

Let's Hear it for Organization!


I'm not sure about you, but my system for organizing bills seems to be a little (or rather large) pile on the table, until I am ready to go through them and pay.  When coupons come in the mail, or when I find recipes I like, they go in envelopes or piles. I just love my piles!  But I guess this doesn't work for everyone :)

I decided that I needed to come up with some sort of filing system that wouldn't topple over if you happened to touch it.  I bought a plain black filing box, and a bunch of hanging folders (multiple color). By jolly, I would do something cute!


I took a fancy fabric I had in the closet, and cut around the plain ole' container. Before I used my Mod Podge, I spray painted the whole container teal - and I LOVE this color!!! (so does my grass because there's a huge teal mark where I sprayed outside!)  After it dried,  I used Mod Podge to seal the fabric on it.  

I wrote out different folders: Bills to Pay, Papers to File (in either our safe or box in basement), Recipes to Try (and if I like it - it goes in cookbook or if not - gar-bage), Crafts to Make,  Date Night, Tax Forms (I am getting MUCH better about our taxes and now save all our receipts ), Blog Stuff, and Coupons. 


Now when mail comes in that I deem important, it goes right in the filing system.  As the month goes on, and it's time to pay the bills, I also go through the other folders (coupons to see what expired and so on).  
I try to make the recipes I cut out each month so I can make room for new ones.  
So far, this system has worked!  I absolutely love the colors and now if I leave it out by accident, it's not ugly!!


Signature

June 29, 2013

A Jolly Good Week!


Here's to a Summer Filled with Awesome!  Now, I realize that really doesn't make sense but I like the saying :) 
After one week of Little being off of summer, and me on Day 4 of Summer break - we already accomplished three popsicle activities!

One of my most favorite purchases after the holidays was a Martha Stewart chalkboard. The board has a wonderful border already printed on, but it's not too easy to write and erase.  The cuteness factor makes up for the moments of frustrations!  

After we pick a few activties for the week off of the twine line of popsicles, we  stick them on the board with clothespins.  After we accomplish the task, we check it off and initial the date.  

This week's Checked list: 
Summer pedicure
Drive In Theater
See a baseball game
Eat Breakfast for Dinner

I just love how it's turning out!


Signature

June 28, 2013

Melt Into Summer

Each summer starts out the same way(a paraphrase of multiple conversations leading up to the end of school): 
Me: What do you guys hope to do this summer?
Mr: I don't know.
Little(now Bigger): Something sports related.
Then I rattle off about 30 things I hope to get'er done, but then after 60 days of sun, totally forget about.  If only I had a LIST (yes. because I love my lists).  Wait - I make lists, oodles and oodles of lists, but then I lose them!  This laundry list needed to be out in the open if I wanted to actually finish everything I wanted.  
Last week, we sat down as a family and created activities to accomplish this summer. Instead of focusing only on trips which cost moolah, we also thought of things to do that fall into: Free Outdoor, Free Indoor, Crafty, and Food Related.

  During my prep periods this last week of work, I racked my little brain on how to display our Summer Bucket List. With over 50 activities planned (some free and some a little cash), I wanted to figure out a way to put it out there where we will be reminded to DO it.

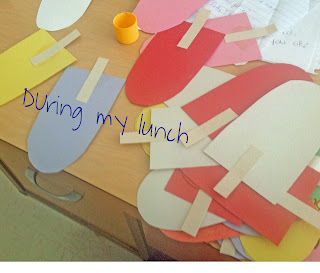
As temperatures in my classroom soared above 95 degrees, some of my students complained they actually felt their skin melting(gross image). Fantastic! Bingo! That was it! I cut out over 70 popsicles out of construction paper, and in my neatest teacher handwriting, wrote down the activities that I hoped we could accomplish throughout the summer. 


Before going home, I stopped at Michaels to pick up teeny tiny clothes pins to hang the popsicles  where we can see them. After showing Mr. the handful of popsicles, I enlisted him to help me hang the twine between the windows, and starting pinning them for display. I couldn't help but squeal as I watched him pin them! It was actually what I had hoped for!  


I just love the multiple colors! Here are some of the popsicles listed: Have an Unbirthday party (Little's birthday is in December so he never gets an outdoor event!), Hang with family, Meadowlands Flea Market, Mini golf, and Video Game day. 


At the start of the week, we will pick a few activities we hope to accomplish that week :)  Then move them to the chalkboard leaning against the wall on the cupboard.  After achieving each one, we check it off and write the date!  Mr. had a great idea to cut the edge so it looks like someone took a bite out of it :) 

We hung this up before I was done with school, but our official "Summer Bucket List" won't take place till I am out! Wahoo!  

What would you add to your summer bucket list?


Signature